
We often get inspiration for our model railroads from our favourite railways or locations. We might like a particular station, junction, or industrial track plan and want to incorporate it into our own layout. With AnyRail, you can import images from Google Maps or Google Earth, resize them, and use them as a baseline for laying out your model railroad tracks. This is how I did it.
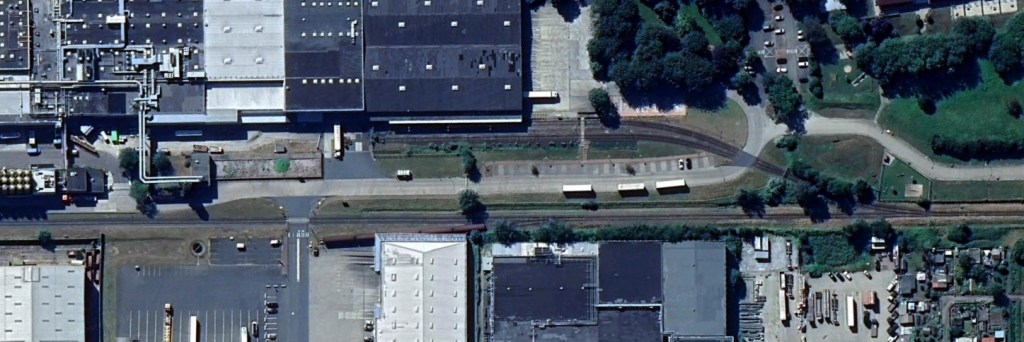
First, I selected the industrial area and the corresponding tracks I wanted to model in Google Maps/Earth. Using a snipping tool, I defined and captured the required area.
In AnyRail, go to Insert → Add Image. To simplify the process, I created a separate layer called “Google Maps Overlay”. This allows me to toggle the image on and off at any time. I then resized the image to match the dimensions of my baseboard or module and aligned the tracks in the image with the guide lines on the module. In my case, I have a centre line 20 cm from each module edge, which I used as the baseline to align the straight track from the image.
Next, I adjusted the image transparency to around 40–50%. This allows me to see both the shadows of tracks and structures in the image as well as the module underneath.
I then added the Peco Code 55 turnouts and flex track on another layer called “Gleise (Tracks)” and aligned them with the tracks shown in the image. Using the layer toggle (light bulb icon) on the “Google Maps Overlay” layer, I can easily show (yellow bulb) or hide (white bulb) the image as needed.
If you no longer need the “Google Maps Overlay” layer, you can simply delete it.
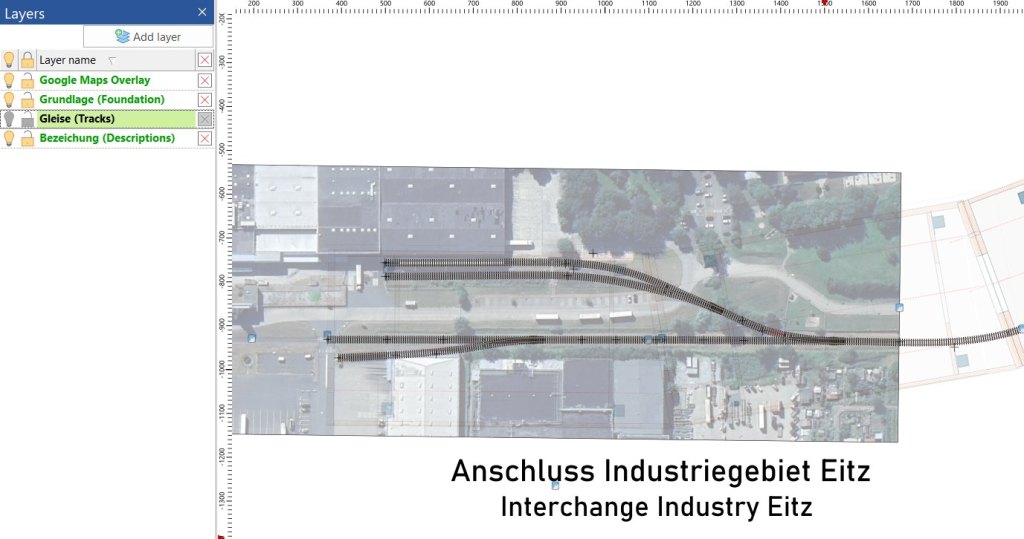

If you want to follow the prototype exactly, you can do so. In my case, I adjusted the positions of the tracks and turnouts to fit my module dimensions while still maintaining a high level of fidelity to the actual track plan. There are always compromises in model railroading—whether due to space or budget.
Happy trying!
